

Salesforce Marketing Cloud Custom Profile and Preference Centre
Custom Profile & Subscription Centre Working
1. Why we need Custom Profile & Subscription center
- In SFMC we have seen Preference/Profile center either from Email Studio or at the bottom of email content messages using profile center URL. So, in standard one, there is not any designing option like we’re not able to change the logo, font-size, button, and other UI elements.
- To overcome this issue, we need to make a Customized Profile & Subscription Centre using cloud landing pages as well as use programmatic language (AMPScript, SSJS).
2. How we can get all the details of any subscriber into our cloud Page
- We’re using CloudPagesURL inside our email content message that will give us subscriber information (emailaddr, _subscriberkey, member id, jobid, batchid).
- Inside this method, we need to define Cloud Page ID. We can get this page id from web studio → Collection → Cloud Page Properties → Page Id.
Example: Using the anchor tag inside our email message content, we can set our cloud page Id.
 <a alias="Custom Preference Centre"
          href="%%=CloudPagesURL(552)=%%"
     title="Custom Preference Centre">
   Custom Preference Centre
</a>
3. Profile Centre Cloud Page Working
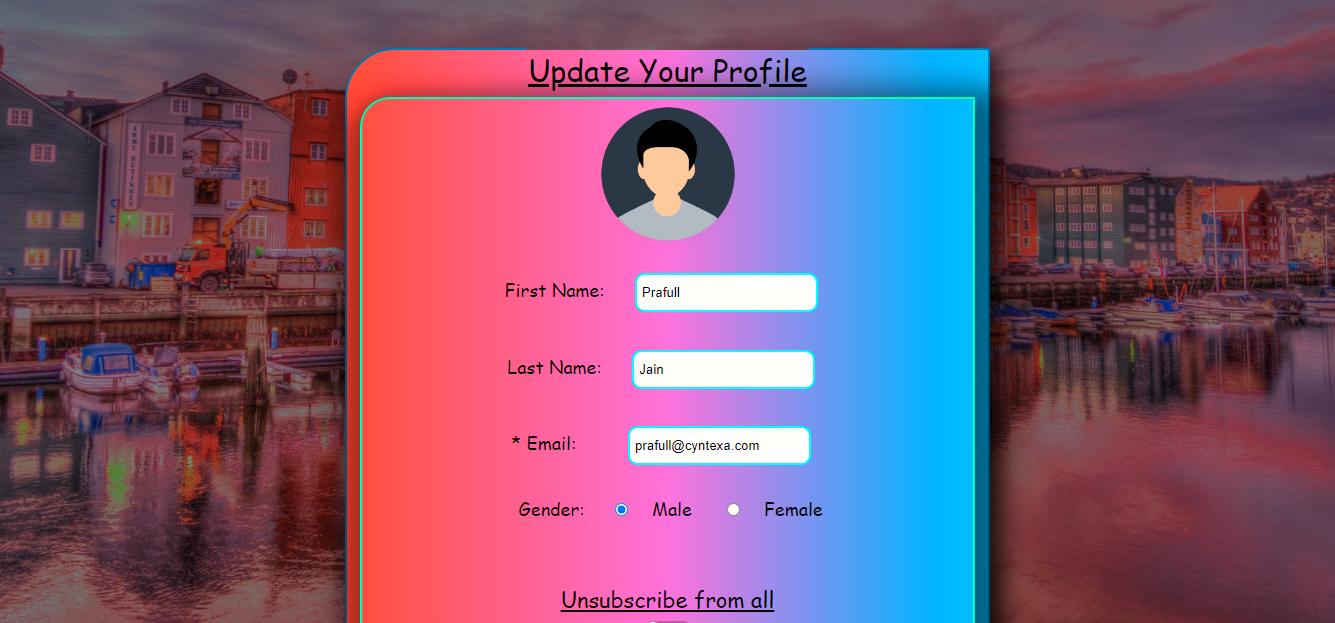
Step - 1 → We need to get all the Pre-populated values from the All Subscriber list as we’re updating the profile attribute fields. In the All Subscriber list we’ve seen that by default there are 2 required fields (Subscriber Key, Email Address), 3 optional fields (First/Last Name, Gender) & One preferences field (Currently we’re not using any preference fields).
- To get these values we’re using Subscriber Object & their methods as well as using Personalization Strings into AMPScript, but we’re not able to get Attributes & Preference values of any subscriber. https://dreamevent.secure.force.com/articleView?id=mc_es_available_personalization_strings.htm&type=5
- To get Attribute Fields we need to use Subscriber. Attributes Object with the Retrieve method of Attribute. We also need the status of each subscriber and set it into a checkbox type tag inside our form.
Example: Using AMPScript & Personalization Strings
%%[
    SET @subscriberKey = [_subscriberkey]
    SET @emailAddress = [emailaddr]
    SET @genderMale = IIF([gender] == "Male", "checked", "") //gender is the attribute from SSJS & (By Default Value is blank)
    SET @genderFemale = IIF([gender] == "Female", "checked", "") //gender is the attribute from SSJS & (By Default Value is blank)
]%%
// For FirstName & LastName (In SSJS)
var subscriberObj = Subscriber.Init(sk); //Subscriber Object
var attributes = subscriberObj.Attributes.Retrieve();
Variable.SetValue("@fsName", Stringify(attributes[0]["Value"]));
Variable.SetValue("@lsName", Stringify(attributes[1]["Value"]));

// For Status (In SSJS)
var subscriptionStatus = Subscriber.Retrieve({
    Property: "SubscriberKey",
    SimpleOperator: "equals",
    Value: Variable.GetValue("@subscriberKey")
});
if(subscriptionStatus[0].Status == "Active") {
    Variable.SetValue("subscriptionStatus", true);
}
else {
    Variable.SetValue("subscriptionStatus", false);
}
![]() Don't forget to check out: What is Marketing Cloud? Know the Features and Benefits for Businesses
Don't forget to check out: What is Marketing Cloud? Know the Features and Benefits for Businesses
Step - 2 → Now, we want to get all the updated values from the form into SSJS & update it into SFMC All Subscribers list. To get these values we’re using the name attribute inside the input tag & in SSJS we’re using the Platform library method GetFormField(). After getting all the form values we need to understand the Unsubscribe from all/Resubscribe feature.
- At the time pre-populated values in step-1 we are fetching the status (Active/Held/Unsubscribe/Bounced etc.) of Subscriber using Subscriber. Init method. Now, In our form, we’re using conditional statements using IIF of amp script to change our name attribute (unsubscribe, subscribe). Whenever we’re not checked in Unsubscribe from all checkboxes then we’re getting true value of subscribe as name attribute & set it into subscribeTo variable otherwise we’re getting true for unsubscribe variable.
Example:
// In HTML
<input type="hidden" name="subscriberKey" value="%%=v(@subscriberkey)=%%">
// POST VARIABLES (Using name attribute inside input tag)
// In SSJS
var subscriberKey = Platform.Request.GetFormField('subscriberKey') || "";
    var firstName = Platform.Request.GetFormField('firstName') || "";
    var lastName = Platform.Request.GetFormField('lastName') || "";
    var email = Platform.Request.GetFormField('email') || "";
    var gender = Platform.Request.GetFormField('gender') || "";
    var unsubscribe = Platform.Request.GetFormField('unsubscribe') || false;
    var subscribeTo = Platform.Request.GetFormField('subscribe') || false;
Step - 3 → To update the status as Unsubscribed we need the Unsubscribe method of Subscriber.Init() and to make it as Active we need to firstly make an Object variable that has all the attributes values (First/Last Name, Gender) inside Attributes Property as Key and other EmailAddress, SubscriberKey, Status values.
Example:
For Unsubscribing inside SSJS
var subObj = Subscriber.Init(subscriberKey);
if(unsubscribe) {
    var unsubscribeSatus = subObj.Unsubscribe();
    Variable.SetValue("unsubscribeSatus", unsubscribeSatus);
}
For Subscribing inside SSJS
var subscriberData = {
    "EmailAddress":email,
    "Attributes": {
        "First Name" : firstName,
        "Last Name" : lastName
    }
};
else {
    var udpateStatus = subObj.Update(subscriberData);
    Variable.SetValue("unsubscribeSatus", (subscribeTo &&   udpateStatus)?"SUBSCRIBED":"NA"); //Used as a ternary operator
    Variable.SetValue("udpateStatus", udpateStatus);
    Variable.SetValue("formSubmitted", true);
}
Step - 4 → To show SweetAlert , we’re creating or we can say updating the variable (If it’s not already created) value using the response of Unsubscribe method or Update method and after that we’re displaying sweetalert message through IF Else statements. Please add the CDN of Sweet Alert 3rd Party JS Library.
Example: Using If Else inside AMPScript
 %%[ IF @formSubmitted AND @udpateStatus == "OK" AND @unsubscribeSatus == "NA" THEN ]%%
    <script>
      Swal.fire("Updated!", "Your preferences are updated successfully", "success").then(() => {    location.href = location.href; });  </script>
NOTE: For Gender Checkbox, we’re not using the default value from Subscriber Attribute instead we’re setting it using IIF of ampscript & the default value is “”.
4. Subscription Centre Cloud Page Working
Step - 1 → We need to get all the Pre-populated Status values of lists and Status of Subscriber using All Subscriber List (Subscriber.Init() Object) → Lists (Subscriber.Lists.Retrieve) and iterate it through for loop using the Lists length. Now we fetch all the required information of the list to display using the Write method of SSJS.
- Unsubscribe from all features is the same as we see in the profile centre working.
Example: To get Subscriber List Values
var subsKey=Variable.GetValue("@sk");
var subscriberObj = Subscriber.Init(subsKey);
var disSubslist = subscriberObj.Lists.Retrieve();
for(var i = 0; i < disSubslist.length; i++) {
    Variable.SetValue("@listStatus", disSubslist[i]["Status"]);
    Variable.SetValue("@listId", disSubslist[i]["List"]["ID"]);
    Variable.SetValue("@listName", disSubslist[i]["List"]["Name"]);
}
Step - 2 → Now, we want to get all the updated values using the name attribute of the input tag. We only get the active list name with their id. So we need to find the unsubscribed list id first then updating the status field using 2 arrays into Object type variables and the upsert method.
- The value of the input tag for the list that was generated dynamically using for loop has the format like “ListName:ListId”. So we’re firstly finding active list id → Original List Id (Using Subscriber Object) → Unsubscribed List Id (Using array diff method that finds the unique elements).
Example: Getting array like values for listname:listid i.e separated by comma
var activeLsNameWithId = Platform.Request.GetFormField('activeListName');
activeLsNameWithId-->Newsletter:5626, Promtions:5628
To find differences between the original list id and the current active id, we use another array that deletes the current active list id values from the original one & returns unsubscribed list id values.
![]() Check out an amazing Salesforce video tutorial here: Salesforce Tutorial | Data Extensions in Marketing Cloud
Check out an amazing Salesforce video tutorial here: Salesforce Tutorial | Data Extensions in Marketing Cloud
Step - 3 → To update the status of each list, we’re firstly checking the length of both arrays(Active List Id, Unsubscribed List Id) then making an Object variable in which we’re giving the “Lists” property as Key & inside that key we’re giving Id (List Id),status and action (Add,Update,Upsert).
- After that we’re using a Subscriber → List object Upsert method to Upsert the list's status.For Status in All Subscriber List we’re doing just like profile centre.
Example:-
if(correctActiveLsId != 'undefined') {
    var listSubObj = Subscriber.Init(subscriberKey);
    for(var j = 0; j < correctActiveLsId.length; j++) {
        var subscriberData1 = {
            "EmailAddress": email,
            "SubscriberKey": subscriberKey,
            "Lists": {
                "ID": parseInt(correctActiveLsId[j]),
                "Status": "Active",
                "Action": "Upsert"
            }
        };
        var status1 = listSubObj.Upsert(subscriberData1);
    }
}
if(correctUnsubscribedLsId.length>0) {
    var listSubObj2 = Subscriber.Init(subscriberKey);
    for(var k = 0; k < correctUnsubscribedLsId.length; k++) {
        if(correctUnsubscribedLsId[k]!='undefined') {
            var subscriberData2 = {
                "EmailAddress": email,
                "SubscriberKey": subscriberKey,
                "Lists": {
                    "ID":parseInt(correctUnsubscribedLsId[k]),
                    "Status": "Unsubscribed",
                    "Action": "Upsert"
                }
            };
            var status2 = listSubObj2.Upsert(subscriberData2);
        }
    }
)
Output

For Reference:
- https://ampscript.guide/
- https://sfmarketing.cloud/
- Gist link for Customized Profile & Subscription Centre


Gist Link --> https://gist.github.com/PrafullJain/5161cb1befbb8954c24dd7493d19c6e1