

Salesforce Data Loader Guide - Here's All You Need to Know
Data Loader
- It is a Client Application used for importing and exporting bulk data.
- Using it we can Insert, Delete, Update, Upsert, and export the Salesforce records.
- When importing data, Data Loader only reads the data from the .csv file.
How we can Install it
- Log in to your Salesforce application.
- Go to setup
- Search for Data Loader
- There, you will find the download links for both Windows and Mac.
Features
- It is supported for large files with up to 5 million records.
- Drag-and-drop for field mapping. Also, we can save field mapping.
- Support for all Salesforce objects, including custom objects.
- We get the success and error log files in CSV format.
- A built-in CSV file viewer.
- Support for Windows and Mac.
![]() Don't forget to check out: CSV Files in Salesforce | Data Import | How-to Guide
Don't forget to check out: CSV Files in Salesforce | Data Import | How-to Guide
When to Use Data Loader
- When you need to upload 50,000 to 5,000,000 records. Data Loader is supported for uploading up to 5 million records.
- When you need to load into an object that is not yet supported by the import wizards. Because import wizards supported only a few objects.
- When you want to export your data for backup purposes.
Data Loader Operations
1. INSERT
- Click on Insert. Log in with your Salesforce credentials.

- Click on Next. Now select the show all Salesforce object checkbox then select the Salesforce object in which you want to insert the records and choose the .csv file that you want to upload. Click on Next.
- Now map the fields by using drag and drop.

- Click on Ok. Click on NEXT and then click on Finish.
- After inserting the records, it will display the success files and error files which we can save in any folder.
2. UPDATE
- Follow the same procedure for updating the records as well.
- The only difference is that when we update the records CSV files contain the updated records with IDs field so that only those records will update.
3. UPSERT
- Follow the same procedure for upserting the records as well.
- Using Upsert we can insert the new records as well as update the existing records. For Instance, If the CSV file contains the records of the Account object, then the record is updated in the account otherwise it will insert that record into the account object.
4. DELETE
- Follow the same procedure for deleting the records as well.
- Using this operation, we can delete the records from your Salesforce organization.
- The data deleted by this operation will be available in the Recycle bin.
![]() Check out an amazing Salesforce video tutorial here: Salesforce Data Management - Data Loader - Insert, Update, Upsert, Export, Delete
Check out an amazing Salesforce video tutorial here: Salesforce Data Management - Data Loader - Insert, Update, Upsert, Export, Delete
5. EXPORT
- Export means extracting the data from an organization.
- Click on Export. Now, you can choose the fields you want and also filter the records. Click on finish.
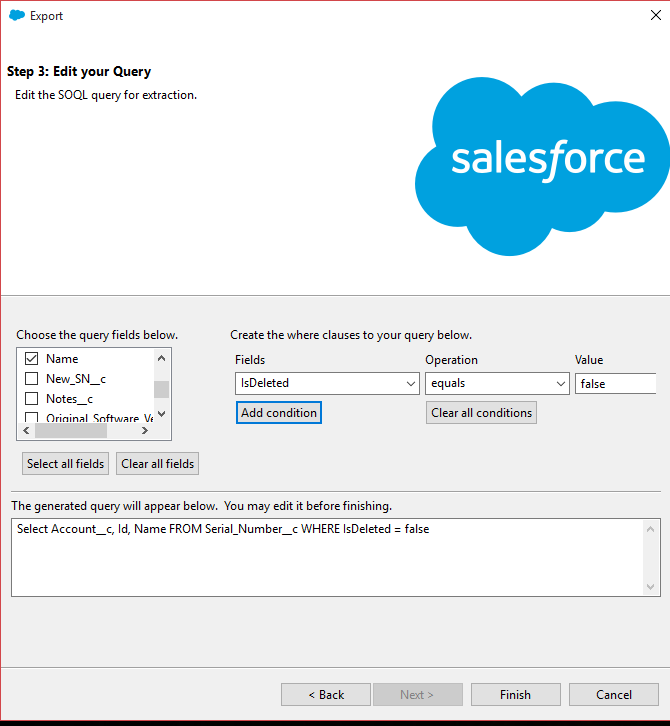
Note: Export All means all the records that exist in Recycle bin are also exported.


Responses