

Salesforce with Jira - A No Code Integration Guide
To begin, Exalate must be installed on both Jira and Salesforce. After that, you proceed to establish a link between them. After that, you can begin synchronizing Salesforce entities with Jira issues. You can configure and control what information is shared between them as needed.
Step 1: Install Exalate on Salesforce first
Exalate for Salesforce is now available as part of Salesforce's Early Access Program (EAP). In this part, we'll show you how to install it using the EAP, but if you prefer, you can jump straight to the detailed approach here.
To begin, log in to your Salesforce instance and begin configuring Exalate. Click "Setup" in the top right corner of your Salesforce instance.


If you've used Salesforce before, you're probably aware of how connected apps function. You can name your app whatever you want, but it only makes sense to call it "Exalate," which is exactly what we do here. The API name will be filled in automatically. Then you must include your contact email address.

After you've enabled the OAuth settings, provide the Early Access program a callback URL. Salesforce uses this to make a call back to your application.
To apply OAuth Scopes to the Exalate app, you must first select them. When an app is allowed, OAuth scopes specify permissions that are granted as tokens to the linked app. Add the rights shown on the screen below to allow Exalate to have all of the essential permissions.

Step 2: Install Exalate in Jira
Installing Exalate on Jira is a simple process. You may either do it via the Exalate website or from the Atlassian marketplace.
Here's where Exalate from Jira can be set up.

Select "Find new apps" from the left-hand submenu.


![]() Don't forget to check out: Integration using Salesforce Connect
Don't forget to check out: Integration using Salesforce Connect
Step 3: Integrate Jira and Salesforce
When Exalate is first installed, the first thing you do is establish a connection on one side and accept it on the other.
We'll start the connection from Salesforce here, but you can do so from either side. Exalate provides a consistent user interface across all platforms, so you don't have to worry about where to begin or how to proceed.
This is how your Salesforce instance appears. If you've accidentally logged out, take these steps to re-enter your account.


Because we're starting the connection from Salesforce, specify the Jira instance URL. Following a quick check, you must now select the connection mode.
Exalate for Salesforce is available in two different modes: Basic and Script. Basic mode provides a no-configuration, low-code user interface that is ideal for simple synchronization scenarios. In this mode, you can't alter any of the established mappings or setups.
Following the "Next" button on the previous screen, you will be prompted to confirm that you have admin access to the destination site, in this case, the Jira instance.
"Yes, I have admin access," select "Initiate," and then "Yes, I have admin access." You'll have to manually copy and paste an invitation code on the Jira side if you don't have access.
In the Script mode, you'll learn more about how to do this.


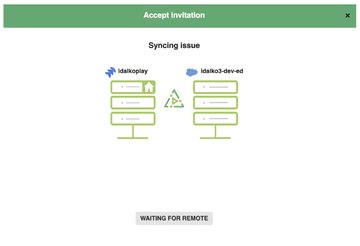
Wait a few moments after clicking "Exalate" for the relevant status messages to appear.

Step 4: Set the information that is shared by configuring the connection
After you've set up your Jira Salesforce connector, it's time to manage what data is sent between the two systems.
You can do this with Exalate by configuring the connection. To do so, go to your Salesforce or Jira instance's "Connections" tab and look for your connection there.
To edit a connection, click the edit symbol.

The "Info" tab displays general connection information such as the connection name, the destination instance URL, and the connection type. If you like, you can go ahead and change the connection's description in this.

Outgoing sync rules determine what you want to send to the other side, and incoming sync rules determine how you interpret data received from the other side.
These principles apply to both sides of the connection; the only difference is how the entities are addressed. They are determined by the platform from which the connection is made. You can either update the rules right immediately in the textboxes, or copy and paste them somewhere secure to work on later.
You can simply delete or comment on the line containing the data you no longer want to share, and it will be disregarded during synchronization. Before the beginning of the line you want to remark, add "/." This will only comment one line.
Add "/*" at the beginning of the block of lines and then "*/" wherever you want the comment to end to add a comment for several lines at once. If you don't want to sync the Case description with Jira, for example, simply add "//" to the beginning of the line in the Outgoing sync rules, as seen below.

Depending on whether you want to update the data transmitted or received, you can edit them in the outgoing sync rules part of the incoming sync rules section.
![]() Check out another amazing blog by Apphienz here: Top Salesforce Spring '22 Features (Part- 1)
Check out another amazing blog by Apphienz here: Top Salesforce Spring '22 Features (Part- 1)
Step 5: Set up automated synchronization triggers
The conditions under which Jira problems and Salesforce entities must synchronize are determined by triggers. You might wish to automatically create an issue whenever a "Case" in Salesforce is created or changed, or synchronize an "Account" in Salesforce tied to a certain customer with Jira. Whatever the circumstances, they are simple to apply.
In both Jira and Salesforce, the method for creating triggers is the same, but the search queries on both ends are platform-specific. For example, Jira uses JQL (Jira Query Language) and Salesforce uses SOQL (Salesforce Object Query Language).
Generating triggers is a friendly and straightforward process. You can always learn more about how to use Jira with Salesforce triggers.
We'll create it on the Salesforce side for this phase. You should now be on the modify connection screen if you've followed this guide step by step.
Even if you're not there, go to the Exalate console's "Connections" tab and click the edit connection button. Select "Triggers" from the tabs above.
Additionally, you can use Exalate's left-hand menu to construct a trigger. Both methods lead to the same screen, however, the latter asks you to select the connection for which you want to establish a trigger because it's on the general tab. The screen will be blank if this is your first trigger.
To get started, click "Create trigger." You'll be brought to the "Add trigger" screen now.

One can make a trigger by specifying filtering conditions. If you select Opportunity from the drop-down list, for example, you can manually fill in the details as seen in the screen underneath.

In the "If" section, write the question. Don't forget to include "Notes" in your list. If you have an excessive number of triggers, they will assist you in determining why they were formed.

When you're finished, click "Add."

Toggle the "Status" button to activate or deactivate the trigger from this panel.
You can also alter, delete, or "Bulk Exalate" the trigger by clicking the three dots beneath "Action." You can use bulk exalate to sync existing issues or entities that meet the trigger requirements you've established.
Remember to click "Publish" once you've finished making all of your changes.
Step 6: Begin to synchronize information.
We began by establishing a link between Jira and Salesforce.
You can sync in Basic mode by establishing triggers or utilizing the "Bulk Connect" option to synchronize several issues or entities. You can also look into using the "Connect" method to sync existing Jira issues with Salesforce.
When you've finished arranging the synchronization the way you want it in Script mode, the issues or entities will be synced automatically when the conditions are met.
Exalate checks for syncs and updates on a regular basis, so if your synchronization isn't reflected right away, give it some time and attempt afresh.
You can change the sync rules and triggers at any moment to ensure that everything is working correctly.
If you are looking to integrate Jira with Salesforce, get in touch with us. Our expert team will assist you in incorporating the software to make your work easy and efficient. To know more about us, our services, visit our website and contact us if you have any further questions.


Responses