

Setting SSO between Salesforce and Okta’s Custom Application using SAML 2.0 protocol
1. SSO(Single Sign On between Okta as Identity Provider and Salesforce as Service Provider) Steps to setup SSO between Salesforce and Okta:-
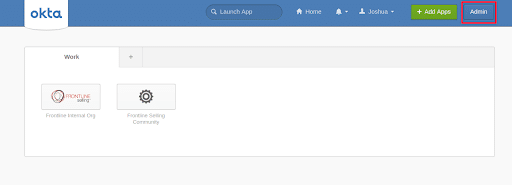
- Log in to your Okta admin account.
- Click on the Admin button on the top right side, this will open a page as shown below :-
- Click on the Applications tab all the added apps are visible here.

- Click on Add Application button, this will open a page from where we add application which will provide SSO.

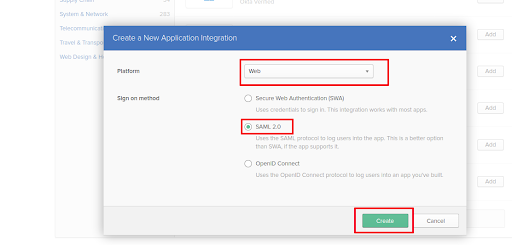
- Then click on Create New App button, this will open a pop up where we select Web for Platform and SAML 2.0 for Sign On Method field then click Create.

- Give the app name and assign your company logo to it, if you want to restrict users from seeing the app icon then check the first checkbox and if you do not want the app icon visible in okta mobile app then check the second checkbox and then click Next.

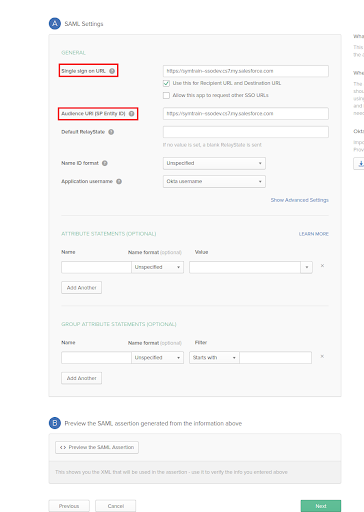
- Here you will configure the SAML setting, for now put your salesforce domain url in Single sign on URL and Audience URI (SP Entity ID). We will come to this setting later after configuring SAML setting at salesforce because from there we will get Single sign on URL, click Next.
- This page is for Help Okta support to understand how you configured this application, fill this and click Finish.

- Now you have completed your General setting and come to Sign On setting, click on View Setup Instruction button.

- This will take you to new tab where you will be provided with URLs and Sign On certificate which will be configured in salesforce.
- Click on Download Certificate button to download that certificate.

- Now go to your salesforce org and type Single Sign-On Settings in quick find/search box and click the link - Single Sign-On Settings.
- Click on Edit button and check the SAML Enabled checkbox, then click Save.


- Click on the New button to create new SAML Authentication service.
- Put any Name and API Name satisfying those field validation.
- Copy the Identity Provider Issuer which is there in the new tab opened from View Setup Instruction button and paste it into the Issuer field.
- Choose that certificate which you have downloaded earlier in Identity Provider Certificate field.Put your salesforce domain url in Entity Id field.
- Select Assertion contains the User's Salesforce username in SAML Identity Type, this means Username is the identity field which will be used for performing SSO from Okta to salesforce.
- Copy Identity Provider Single Sign-On URL from View Setup Instructions tab and paste in Identity Provider Login URL field of salesforce.
- Check Single Logout Enabled checkbox and put the URL where you want to redirect after logging out from salesforce. Here we are using Identity Provider Single Sign-On URL as it will redirect to Okta Sign In page from where we can again log in to salesforce after providing the Okta credentials.
- Leave other fields as it is and click Save.

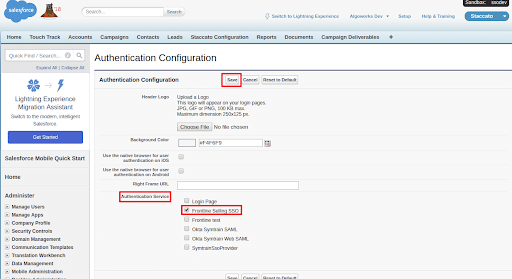
- Type My Domain in quick find/search box and then click My Domain link.

- Click Edit in the Authentication Configuration section and select only that SAML configuration you have just created.
- Click Save.
- Now come back to Okta and click on General tab.
- This will open general setting page, click on Edit button in the SAML Setting section.
- Click Next.
- Copy the Login URL from SAML Configuration setting you have just created and paste it in Single sign on URL field as shown below :-

- Click on Show Advanced Settings link and check Enable Single Logout checkbox.
- Now type the URL which you want to redirect after Logging out from Service Provider(Salesforce) in Single Logout URL field. Here we put Identity Provider Single Sign-On URL which we have got from View Setup Instruction tab because after logging out from salesforce it will take us to Okta Login screen and after logging in it will again redirect to salesforce org home page without asking salesforce credentials.

- Now for the Signature Certificate field you have to manually create certificate, go to SAML Configuration setting record and click Download Metadata button, this will download a XML file.

- Open that file and copy the text between ds:X509Certificate and paste it in the notepad between ‘-----BEGIN CERTIFICATE-----’ and ‘-----END CERTIFICATE-----’ as shown in the image :-

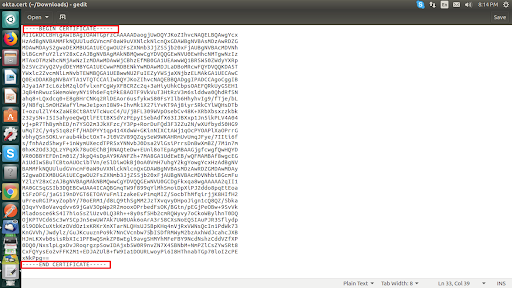
- Save that notepad and rename the file type to .cert or .pem.
- Put that certificate in the Signature Certificate field.
- Copy the salesforce domain url and paste it in SP Issuer field.
- Click Next and then Finish.

- Click Assignments tab for assigning user to this app, Only assigned user can see the app at their home page.
- Click on Assign button and then click Assign to People, this will open a pop up which have all okta users in it.

- Click on Assign button right side of the user’s name to whom you have to assign the app.
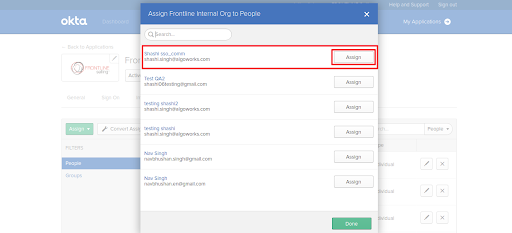
- Now Copy the user’s Username(salesforce) to which you have to link to that Okta user and paste it in the User Name field on the pop up. We are mapping Username for SAML assertion, when any user in okta click on the app icon on its okta’s home page, this will logged into the salesforce with that user to which we have mapped the username field.
- Click Save and Go Back button.

- Now if assigned users login to their okta account, they will see a app icon which we have created and by clicking it, this will logged into the salesforce with the mapped user account.
- And for setting up SSO with salesforce community just replace the salesforce domain url with community domain url in Okta app configuration.


