How to Configure Salesforce Lightning Components for Custom Actions?
Custom Actions are Object-specific actions.Object-specific actions let users create records that have automatic relationships to other records, make updates to specific records, interact with records in ways that you define.
Lightning Component can be enabled to use as a custom action in Lightning Experience or the Salesforce mobile app by implementing force:lightningQuickAction or force:lightningQuickActionWithoutHeader interface.
Lightning Components that implements force:lightningQuickAction display in a panel with standard action controls, such as a Cancel button While Components that implement force:lightningQuickActionWithoutHeader display in a panel without additional controls and are expected to provide a complete user interface for the action.
Following are the steps to add a lightning component to a Custom Action:
- Go to setup
- Click ObjectManager next to Home from tab section
- Select the Object ( let’s take Opportunity ) and select Button, Links and Actions and click New Action
- Fill all the required fields in the form with appropriate. In the form select Action Type as Lightning Component and click save button
-
Fill the Details as shown in below screenshot and click save button
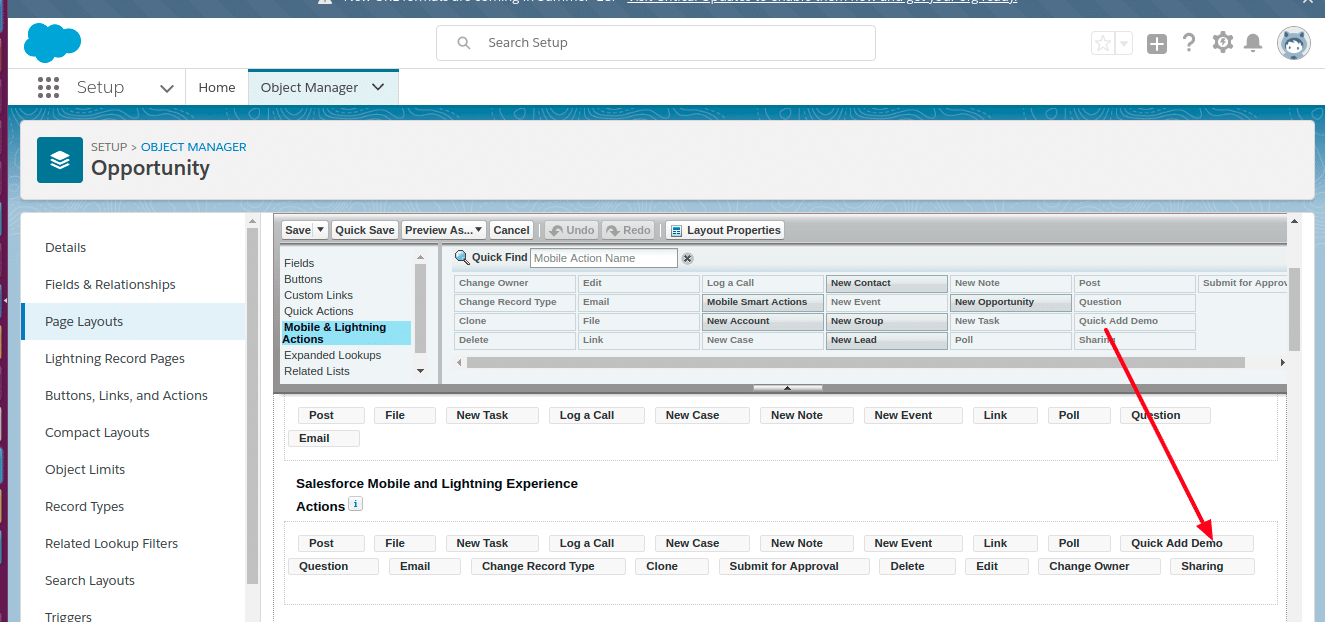
- Once the action is successfully created,Go to page Layout section and select the appropriate page Layout. Lets for example select opportunity layout
- On the Layout, go to Salesforce1 and Lightning Experience Actions section and Map the lightning action from Layout editor to the Layout page as shown in this image and click on the save button
- Go to opportunity and open a record and click on your lightning action/quick action that has used lightning component from action drop down


