

Comprehensive Guide on Salesforce Web-to-Case
For any organization or business, growth depends on how they provide service(s) to the customer.
Getting comprehensive details of customers’ problems is one of the most important and foremost steps towards generating a case. And it depends on the ease with which they can submit the problem and raise a ticket.
Then the second step is to solve that problem as soon as possible and give information in the best possible manner. So, for that Salesforce comes with a magic stick of web-to-case functionality.
Let us dive deeper into it…
What is the Web-to-Case?
Web-to-Case refers to the process of capturing cases from a website. Salesforce Web-to-Case allows businesses to construct a web form that they can embed on their website and use to simply establish a case in Salesforce for its Support & Service clients.
- Web-to-Case comes under the Salesforce Service Cloud. It is Cloud-based service management.
- The values submitted through the web in the Web Name and Web Email boxes will be saved in the newly created Case. If the email address is linked to a Contact in Salesforce, the case will be instantly linked to the contact who owns that email address as well as the corresponding account.
- However, you should consider the various fields you require in your scenario before you set it up.
- Support issues are tracked using cases. A case record will be created whenever a consumer purchases a product or service and then calls for help. A customer’s question or feedback can constitute a case.
- An open case will have a status as “unresolved” while a closed case will have status as “resolved”
Let us now see how to set up Web-to-case…
![]() Don't forget to check out: Salesforce Forms Integration Without Code
Don't forget to check out: Salesforce Forms Integration Without Code
How To Set Up Web-To-Case?
- Before creating a Web-to-Case form first enable Web-to-Case in org.
- How to enable and create it
Go to setup in quick find box type web to case and click on it

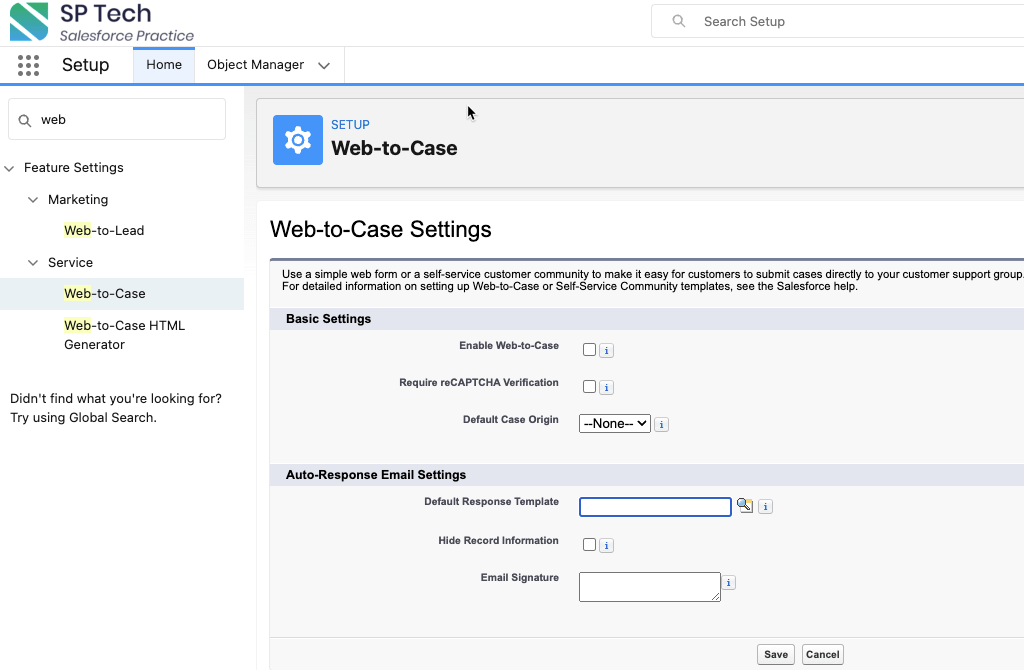
Enable the checkbox as shown in the picture and if this box is enabled only then we can create a web to Case form.
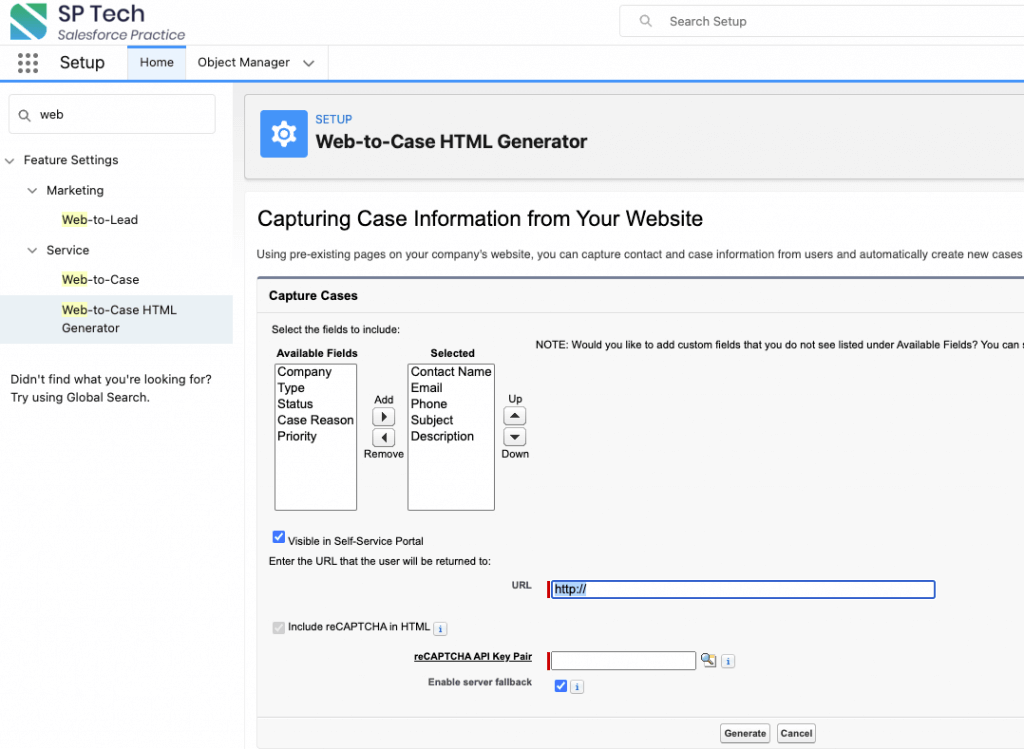
- Capture cases -> Select fields to include and Add
- Check Visible in self-service portal
- Enter the URL to which customers are directed after they submit their information.
- Fill in the ReCAPTCHA field.
- Click Generate
Now copy HTML code in notepad and save as HTML file
![]() Check out another amazing blog by SP Tech here: A Guide to Salesforce ZeroBounce Integration
Check out another amazing blog by SP Tech here: A Guide to Salesforce ZeroBounce Integration
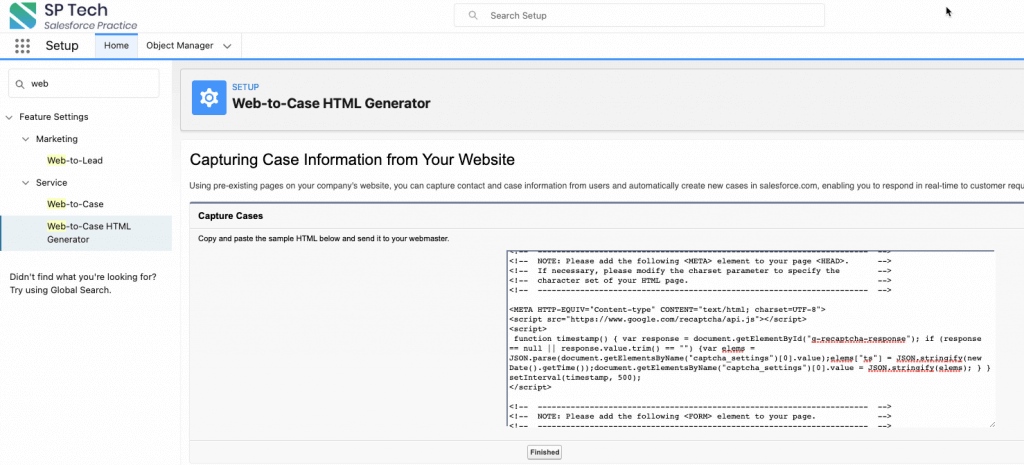
- Embed the HTML code into your website
Here Are Some Pro Tips:
Points to remember before creating a web-to-case form
- Before creating cases submitted information using a Web-to-Case form, Salesforce runs field validation rules. The cases which are no Cases without valid values are not created.
- All universally required fields must have a value before a case can be created. All required fields must have a value before generating a case.
- Salesforce does not support rich text area fields on web-to-Case forms.
Conclusion on Salesforce Web-to-Case
We can capture cases from our website. Anyone visiting the website can fill in the information on important fields (name, contact, Case Origin, Case Reason, Subject, Description, product, Product Type) and when they click to submit then the data is stored in Case object with a new record.
We can capture cases from several ways like Create Web-To-Case form and upload it on our website, with the email (Email-To-Case) and, we can use a third-party tool to create a case by integrating that tool with salesforce.org.
It is extremely useful to provide hassle-free service to customers and gather customer support requests directly from the Company website or application. They can submit Service Request directly by phone, email, or web.


Responses